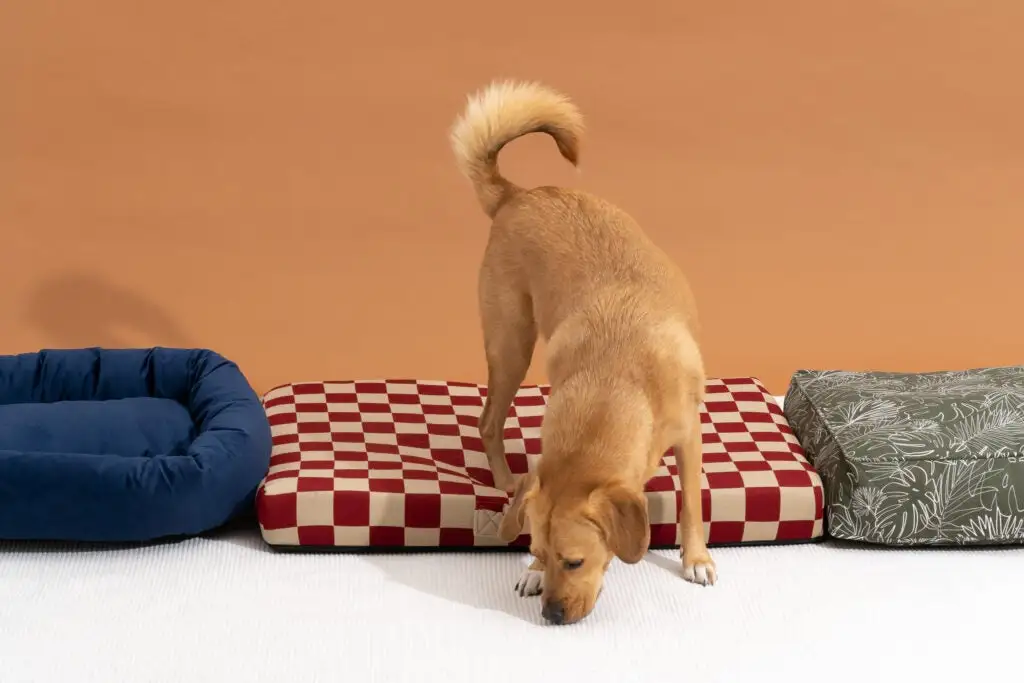
Your dog’s clicking across the hardwood floor isn’t just annoying—it’s a warning sign. When nails grow too long, they force your dog’s toes to splay unnaturally with every step, causing joint pain that can lead to arthritis. Choosing the right dog nail clippers and learning proper technique transforms this dreaded chore into a quick, stress-free routine that keeps your companion comfortable and healthy.
Quick Answer
Dog nail clippers are specialized grooming tools designed to safely trim canine nails without crushing or splintering. The three main types—guillotine, scissor, and plier-style—each offer different benefits depending on your dog’s size and nail thickness. Regular trimming every 3-4 weeks prevents joint problems, reduces furniture scratching, and keeps your dog moving comfortably.
TL;DR: Plier-style clippers work for most dogs, guillotine for small breeds, and grinders for nervous dogs. Trim just before the quick, use styptic powder for accidents, and reward heavily to build positive associations.

Table of Contents
Key Takeaways
- Match clipper type to dog size: Small breeds do best with guillotine or scissor-style; large breeds need plier-style clippers
- Trim conservatively: Cut small amounts frequently rather than risking the quick—you can always trim more next time
- Watch nail color: White nails show the pink quick clearly; black nails require extra caution and a good light source
- Build positive associations: Reward every successful trim with high-value treats to reduce anxiety over time
- Keep styptic powder ready: Quick-stop powder or cornstarch stops bleeding immediately if you nick the quick
Why Nail Trimming Matters
Long nails aren’t just cosmetic. When nails touch the ground during walking, they push back into the nail bed with each step. This constant pressure forces the toe upward and the paw to flatten, changing your dog’s natural gait.
Over months and years, this altered walking pattern strains joints from the toes all the way up to the shoulders and hips. Veterinarians at the American Veterinary Medical Association note that untrimmed nails are a common contributor to arthritis in older dogs.
Here’s what else happens:
Overgrown nails curl under and can pierce paw pads, creating painful wounds. They catch on carpet, blankets, and grass, leading to torn nails that bleed heavily and require veterinary attention. If you notice your dog limping or favoring one paw, overgrown nails could be the culprit.
Your dog may start walking oddly to avoid pressure on long nails. This compensation creates muscle imbalances and back pain. Some dogs become less active simply because walking hurts, leading to weight gain and reduced quality of life.
Regular nail care takes 5-10 minutes every few weeks. That small investment prevents significant pain and expensive vet bills down the road.

Anatomy of a Dog’s Nail
Understanding nail structure helps you trim confidently without causing pain. A dog’s nail has two main parts: the hard outer shell and the quick inside.
The quick contains blood vessels and nerves. It supplies nutrients to the growing nail and feels pain when cut. In white or light-colored nails, the quick appears as a pink area inside the nail. In black nails, you can’t see it at all, making trimming trickier.
The growth pattern matters:
Nails grow continuously, about 2-4mm per month depending on breed and activity level. Dogs who walk frequently on concrete naturally wear down nails, while indoor dogs on carpet need more frequent trimming.
When nails stay long, the quick grows longer too. This creates a frustrating cycle—you can’t trim nails short without hitting the quick. The solution is gradual trimming every week, which encourages the quick to recede over time.
The dewclaw sits higher on the leg and never touches the ground. Since it doesn’t wear naturally, it needs special attention during trimming. Neglected dewclaws can curl completely around and grow into the leg, requiring surgical removal.
Each nail also has a natural curve. Following this curve when you trim creates cleaner cuts and reduces splitting. Cut perpendicular to the curve, not straight across.
Types of Dog Nail Clippers
Three main clipper styles dominate the market. Each has specific advantages depending on your dog’s size, nail thickness, and your comfort level.
Guillotine Clippers
These feature a single blade that slides across a circular opening when you squeeze the handle. You insert the nail tip through the hole, then close the handle to slice through.
Best for: Small dogs under 20 pounds with thin nails, like Chihuahuas, Yorkies, and Maltese.
Guillotine clippers give you excellent control on tiny nails. The circular guide helps you position correctly. However, they struggle with thick nails and dull quickly, requiring blade replacement every 6-12 months.
The single-blade design can crush rather than cut if the blade isn’t razor-sharp. This creates jagged edges that split and fray.
Scissor-Style Clippers
These look exactly like scissors with curved, notched blades. You position the nail in the notch and squeeze handles together for a clean cut.
Best for: Small to medium dogs (5-40 pounds) with moderate nail thickness.
The scissor design offers precision and control. You can see exactly where you’re cutting and make small adjustments. The straight-across cut works well for most nail shapes.
These clippers work great for dewclaws and overgrown nails that need shaping. The downside is they require more hand strength than other types, which can tire your grip during multiple-dog grooming sessions.
Plier-Style Clippers
These resemble pliers with curved cutting blades that close from both sides. They’re the most popular professional choice and work for nearly all dogs.
Best for: Medium to large dogs (20+ pounds), thick nails, and multi-dog households.
Plier-style clippers deliver maximum cutting power with minimal hand effort. The double-blade design creates clean cuts without crushing. Most include a safety guard you can adjust to prevent cutting too deep.
Quality plier clippers last years without replacement. They handle even the thickest nails of breeds like Rottweilers and German Shepherds. The learning curve is gentle—most owners master them within 2-3 trimming sessions.
Best Dog Nail Clippers by Size
Choosing the wrong size clipper turns trimming into a wrestling match. Here are proven options for different dog sizes.
Safari Professional Nail Trimmer for Large Dogs
This plier-style clipper handles the toughest nails without slipping or crushing. The non-slip rubber grips stay secure even when your hands are sweaty during a nervous dog’s trim. Safari’s blades stay sharp through hundreds of cuts, making them a favorite among professional groomers.
Who it’s for: Large breeds over 50 pounds—German Shepherds, Labs, Golden Retrievers, and similar.
The angled blade design lets you see exactly where you’re cutting without adjusting your wrist at awkward angles. The safety stop prevents over-cutting, though experienced users often remove it for more control. One limitation: the spring mechanism can weaken after 2-3 years of heavy use, though replacement is affordable.
Safari Professional Large Dog Nail Trimmer
Millers Forge Pet Nail Clipper
Millers Forge builds clipper handles wider and thicker than most competitors, reducing hand fatigue during extended grooming. The stainless steel blades cut through medium-thickness nails cleanly in one squeeze. Veterinary clinics frequently stock these for their reliability and comfortable grip.
Who it’s for: Medium dogs 25-60 pounds with moderate nail thickness—Beagles, Cocker Spaniels, Border Collies.
The replaceable blade system extends the tool’s life indefinitely. You simply pop out dull blades and snap in fresh ones. The only downside is the slightly wider jaw opening, which can feel clumsy on very small breeds or dewclaws.
Millers Forge Medium Pet Nail Clipper
Resco Deluxe Dog Nail Clippers
This guillotine-style clipper has served professional groomers since 1937. The replaceable compression blade stays sharper longer than stamped blades in cheaper models. Resco’s chrome-plated handles resist rust and clean easily.
Who it’s for: Small dogs under 15 pounds and cats—Yorkies, Pomeranians, Maltese, toy breeds.
The guillotine design gives you precision control on tiny nails where plier-style clippers feel oversized. The circular guide prevents cutting too short. However, blade replacement costs nearly as much as buying new clippers, and the single-blade design can crush nails if your squeezing speed is inconsistent.
Resco Deluxe Guillotine Dog Nail Clippers
Dremel 7760 Pet Nail Grooming Tool
This cordless rotary grinder files nails smooth instead of cutting them. The low-vibration motor runs quietly compared to older grinder models. Four speeds let you adjust power based on nail thickness and your dog’s tolerance.
Who it’s for: Anxious dogs who panic at clipper sounds, and owners who fear cutting the quick.
Grinding eliminates the risk of cutting too deep—you slowly wear down the nail in controlled passes. The tool includes a safety guard that prevents hair tangling in the rotary head. The learning curve is steeper than clippers, and sessions take longer (15-20 minutes versus 5 minutes). Some dogs also dislike the vibration and noise despite improvements. If your dog shows signs of anxiety during grooming, a grinder paired with calming products might help.
Dremel 7760 Pet Nail Grooming Tool
How to Trim Your Dog’s Nails Step-by-Step
Proper technique matters more than expensive tools. Follow this process to trim safely and build your dog’s confidence. For a more detailed visual guide, check out our comprehensive step-by-step nail trimming tutorial.
Step 1: Gather supplies and prep your space
Collect clippers, styptic powder, treats, and good lighting. Choose a non-slip surface—tile or yoga mat on hardwood works well. Avoid carpet where dogs feel secure enough to pull away harder. Have a second person handy for the first few sessions to help stabilize and distract.
Step 2: Desensitize your dog to paw handling
Before any cutting, spend 3-5 days just touching paws during calm moments. Gently hold each paw for 5 seconds, then release and reward. Gradually extend duration and add gentle pressure to individual toes. This prevents the surprise of sudden restraint during actual trimming.
Step 3: Position your dog comfortably
Small dogs do well on a table at your waist height. Medium to large dogs often prefer lying on their side on the floor. Never force an uncomfortable position—stressed dogs remember and resist harder next time. Some dogs tolerate rear feet better than front; start with whichever your dog accepts more easily.
Step 4: Identify the quick before cutting
For white nails, look for the pink inner core and stop 2-3mm before it ends. For black nails, use a flashlight held behind the nail—the quick sometimes shows as a darker shadow. When uncertain, trim just the sharp tip and check the cut surface. If you see a small dark dot in the center, you’re approaching the quick and should stop.
Step 5: Make clean, decisive cuts
Hold the paw firmly but not painfully. Position clipper blades perpendicular to the nail’s natural curve. Squeeze handles in one smooth, quick motion—hesitation causes crushing instead of cutting. Aim for a 45-degree angle cut rather than straight across, which creates a more natural finish.
Step 6: Trim gradually on overgrown nails
If nails are very long, take off only 2-3mm per session. Wait 5-7 days, then trim again. This encourages the quick to recede gradually. Rushing risks painful cuts that set back trust for months.
Step 7: Smooth rough edges
After clipping, use the file side of your clippers or a regular nail file to smooth any sharp edges. This 30-second step prevents snags on carpet and fabric. Some owners skip it, but filing reduces splitting between trims.
Step 8: Reward immediately and generously
Give a high-value treat after each nail—not just at the end. Cheese, hot dog pieces, or squeeze-tube treats work better than regular kibble. Positive association matters more than perfect technique for long-term success. Check if cheese is safe for your dog before using it as a reward.
Clippers vs Grinders vs Scissors: Quick Comparison
Each tool has trade-offs. Here’s how they stack up:
Nail Clippers (Plier-Style)
- Pros: Fast sessions (5-10 minutes), affordable ($8-25), works on all nail thicknesses, minimal noise, compact storage
- Cons: Risk cutting quick, requires steady hands, can split thick nails if dull, some dogs fear the snapping sound
Nail Grinders (Rotary)
- Pros: Nearly impossible to hit quick, smooths edges automatically, good for thick or overgrown nails, reduces splitting
- Cons: Longer sessions (15-25 minutes), more expensive ($25-60), requires charging/batteries, noise and vibration spook some dogs, creates nail dust
Scissor Clippers
- Pros: Excellent precision on small nails, easy to control, good for dewclaws, quiet operation, familiar motion
- Cons: Requires more grip strength, struggles with thick nails, not suitable for large breeds, blades dull faster than plier-style
What to choose:
Start with plier-style clippers for most dogs. They offer the best balance of speed, control, and value. If your dog panics at the clipper sound after several positive training sessions, switch to a grinder. Reserve scissor-style for small breeds or as a backup for dewclaws.
Many experienced owners keep both clippers and a grinder. They use clippers for quick maintenance trims and the grinder to smooth rough nails or tackle extremely overgrown cases.
Size Guide by Breed and Weight
Matching clipper size to your dog prevents frustration and injury. Use these guidelines:
Small (Under 20 pounds)
- Breeds: Chihuahuas, Yorkshire Terriers, Pomeranians, Maltese, toy Poodles, Papillons
- Nail characteristics: Thin, delicate nails that split easily
- Best clipper: Guillotine or small scissor-style
- Special note: Dewclaws are proportionally larger and need extra care
Medium (20-50 pounds)
- Breeds: Beagles, Cocker Spaniels, Border Collies, Bulldogs, Australian Shepherds, Corgis
- Nail characteristics: Moderate thickness, grows moderately fast
- Best clipper: Medium plier-style or scissor-style
- Special note: Active breeds wear nails naturally but still need trimming every 4-6 weeks
Large (50-90 pounds)
- Breeds: Labrador Retrievers, Golden Retrievers, German Shepherds, Boxers, Dobermans, Huskies
- Nail characteristics: Thick, strong nails that dull clippers quickly
- Best clipper: Large plier-style with reinforced blades
- Special note: Black nails are common; use extra caution and bright lighting
Extra Large (90+ pounds)
- Breeds: Great Danes, Mastiffs, Saint Bernards, Rottweilers, Newfoundlands, Irish Wolfhounds
- Nail characteristics: Very thick, often black nails with large quicks
- Best clipper: Professional-grade large plier-style or grinder
- Special note: Consider having a vet or groomer demonstrate first; these nails require significant cutting force
Multi-dog households: Choose a medium or large plier-style clipper even if you have one small dog. The versatility justifies the slightly larger size, and you won’t need multiple tools.
For breed-specific care tips, explore our guides on popular breeds like the Mini Goldendoodle, English Labrador Retriever, and Blue French Bulldog.
Common Mistakes and How to Fix Them
Even experienced owners make these errors. Here’s how to avoid or correct them:
Cutting too much at once. The fix: Trim 1-2mm at a time, checking the cut surface between clips. If you see a gray or pink oval, stop immediately.
Using dull blades. The fix: Replace or sharpen blades every 6-12 months or when you notice crushing instead of clean cuts. Dull blades cause pain even when you don’t hit the quick.
Skipping the filing step. The fix: Spend 30 seconds smoothing edges after trimming. This prevents snags and splitting that lead to torn nails later.
Restraining too tightly. The fix: Use firm but gentle pressure. Excessive force triggers panic responses and makes dogs associate trimming with being trapped.
Inconsistent trimming schedule. The fix: Set a calendar reminder for every 3-4 weeks. Irregular trimming lets quicks grow long, making each session harder than the last.
Trimming without good lighting. The fix: Move to bright natural light or use a headlamp. Shadows hide important visual cues, especially on black nails.
Punishing fearful reactions. The fix: Never scold or restrain harder when dogs pull away. End the session, reward calm behavior, and try again later with better desensitization training. If your dog shows persistent fear, read our guide on solving common puppy behavior problems.
Forgetting dewclaws. The fix: Check all four feet plus dewclaws every session. Dewclaws grow faster since they don’t touch the ground and can curl into the leg if ignored.
Attempting to trim during excitement. The fix: Choose calm moments after exercise or meals. Trim one or two nails at a time if needed rather than forcing a complete session.
Troubleshooting Nail Trimming Challenges
Even with preparation, problems arise. Here’s how to handle them:
If your dog won’t hold still: Break sessions into one nail at a time throughout the day. Reward heavily for each single nail. Consider having a second person offer continuous treats during trimming to create positive distraction.
If you accidentally cut the quick: Apply styptic powder or cornstarch immediately with firm pressure for 30-60 seconds. Don’t let your dog walk until bleeding stops completely. Resume trimming the next day rather than avoiding it—dogs need to learn that one accident doesn’t mean all trims hurt.
If nails are extremely overgrown: Visit a groomer or vet for the first trim. Severely overgrown nails have extended quicks that you can’t safely shorten in one session. Professionals can handle the initial correction, then you maintain from there.
If your dog bites during trimming: This is fear-based aggression. Stop nail trimming entirely and work with a positive reinforcement trainer on muzzle training and fear desensitization. Never punish biting—it confirms the dog’s fear that they need to defend themselves. For more on handling difficult behaviors, see our article on stopping puppy biting.
If black nails make you too nervous: Use a nail grinder instead. The gradual approach lets you stop before reaching the quick. Or have a groomer handle black nails while you manage dewclaws and other lighter nails.
If the grinder overheats nails: You’re applying too much pressure or staying in one spot too long. Use light, sweeping passes of 2-3 seconds each. Let the tool do the work rather than pressing hard.
If nails split after trimming: Your blades are dull or you’re cutting against the natural curve. Replace blades and adjust your cutting angle to follow the nail’s arch.
If your dog constantly licks paws after trimming: This could indicate over-trimming or anxiety. Learn more about why dogs lick their paws and when to be concerned.
When to See a Professional
Some situations require expert help. Seek a veterinarian or professional groomer when:
Red flags for immediate vet care:
- Nail torn off or partially detached and bleeding heavily
- Nail bed appears infected (swelling, pus, red streaking, fever)
- Dog suddenly limps and cries when you touch a nail
- Bleeding won’t stop after 10 minutes of pressure with styptic powder
When to hire a professional groomer:
- You’ve cut the quick multiple times and your dog now panics at the sight of clippers
- Your dog requires restraint beyond what you can safely provide alone
- Nails are severely overgrown (more than 1cm past the pad) with extended quicks
- You have multiple large dogs with thick black nails and limited time
- Your dog shows aggression (growling, snapping) during nail handling
Signs of underlying health issues:
- Nails grow unusually fast despite regular trimming (thyroid problems)
- Nails become brittle, discolored, or develop ridges (fungal infection, nutritional deficiency)
- Dog obsessively licks or chews nails (allergies, anxiety, pain)
- Nails curve dramatically or grow at odd angles (immune disorders)
Professional groomers typically charge $10-25 for nail trimming alone. Many offer “happy visits” where you bring your dog in just for treats and nail touches without actual trimming—this builds positive associations with the grooming environment.
Veterinarians can also trim nails during regular checkups. They have sedation options for extremely fearful or aggressive dogs when safety requires it. Make sure your dog is up to date on their vaccination schedule before visiting groomers or veterinary clinics.
Frequently Asked Questions
How often should I trim my dog’s nails?
Most dogs need nail trimming every 3-4 weeks. Active dogs who walk on pavement may extend this to 5-6 weeks. If you hear clicking on hard floors, it’s past time to trim.
Can I use human nail clippers on my dog?
Human clippers crush dog nails instead of cutting cleanly, causing pain and splitting. The curved blade design doesn’t match the oval shape of dog nails. Always use proper dog nail clippers.
What happens if I cut the quick?
The nail will bleed and your dog will feel sharp pain. Apply styptic powder with firm pressure for 60 seconds to stop bleeding. The quick heals within a few days with no lasting damage if you keep the area clean.
How do I know where the quick is on black nails?
Shine a flashlight through the nail from behind—the quick sometimes appears as a darker area. Alternatively, trim small amounts and check the cut surface after each snip. When you see a gray or pink oval appear, stop immediately.
Why do my dog’s nails grow so fast?
Some breeds naturally have faster nail growth. Diet, age, and activity level also play roles. Indoor dogs grow nails faster since they don’t wear them down naturally. Frequent trimming doesn’t slow growth but keeps them manageable. For nutritional support, explore superfoods that promote healthy nail growth.
Is a nail grinder better than clippers?
Grinders work well for anxious dogs and thick nails but take longer. Clippers are faster for routine maintenance. Many owners use both—clippers for quick trims and grinders to smooth rough edges.
Can overgrown nails cause permanent damage?
Yes. Chronic overgrowth changes joint angles and gait, contributing to arthritis. Extremely long nails can curl into paw pads, requiring surgical correction. Regular trimming prevents these complications entirely.
My dog hates nail trimming. What can I do?
Start desensitization training by touching paws without trimming, then rewarding. Progress to holding clippers near paws, then touching nails with closed clippers. Take weeks if needed. Some dogs do better with grinders or professional sedation. Consider using calming products during training sessions.
Should I file nails after clipping?
Yes. Filing smooths sharp edges that catch on fabric and prevents splitting. It takes 30 seconds and significantly extends the time between needed trims. Use the file built into most clippers or a regular emery board.
At what age can I start trimming puppy nails?
Begin gentle nail handling at 8 weeks old. Trim just the needle-sharp tips weekly to get puppies accustomed to the process. Early positive experiences prevent fear-based resistance in adulthood. Learn more in our comprehensive puppy training guide.
Conclusion
Choosing the right dog nail clippers and mastering safe trimming technique transforms a dreaded chore into a quick routine that protects your dog’s joint health and comfort. Start with plier-style clippers for most dogs, trim conservatively every 3-4 weeks, and reward generously to build positive associations. Watch for the quick on light nails and use a flashlight on dark ones. If you accidentally cut too short, apply styptic powder immediately—one mistake doesn’t mean failure.
The clicking you hear on hard floors isn’t just annoying. It’s your dog’s nails pushing back into their joints with every step, creating chronic pain that worsens over years. Regular trimming prevents arthritis, torn nails, and expensive vet bills while keeping your companion moving comfortably through their senior years.
Take action today: Gather your supplies, review the step-by-step process, and trim just one nail with a high-value reward. That single positive experience builds the foundation for stress-free nail care for life. Your dog’s joints will thank you.
For more essential care tips, explore our complete collection of enrichment activities, nutritional guidance, and training resources to keep your dog healthy and happy.